Creating a Case Series and Case File
To create a new Electronic Case Series,
- Login as System / User Administrator
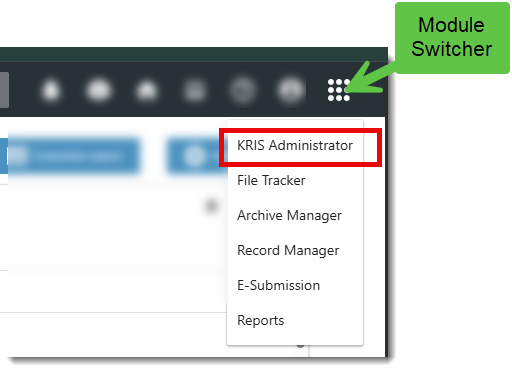
- Click on Module Switcher at the top bar and select KRIS Administrator module.
- Click on Manage Folder link under Manage Classification section.
- Click on Classification Tab for e.g. Subject.
- Click on > to expand the classification.
- Right click on the Subject where the new case series is to be created and select Add Case Series.

- Filling in the compulsory fields (*) :
- *Case Series No. – The unique identifier of the case series which is non-editable after saving. (Note the Case Reference No. has to be unique in the organisation)
- *Case Series Title – The descriptive name of the case series
- *File Type – The type of records in the case series. It is defaulted to Electronic.
- *Security Grading – The Security Grading of the Case Series. It defines the security clearance the role or group role is required in order to access the documents in the folder.
- *Security Method – The Security Method to be taken on the Case Series.
- *Folder Status – The Status of the Case Series. (e.g. Active or Closed or Mark for Deletion).
- Date Created – Date the Case Series is created in the System.
- Date Closed – Date the Case Series is Closed in the System.
- Tag – Additional metadata /category that administrator can assign to this Case Series. Administrator will chose from a list of tags are defined in the Tag Administration.
- Remarks – Additional comments on the Case Series.
- Previous Case Series No. – Additional Information on the previous number of the Case Series .
8. Click on Next Step button.
In Define Access List, Inherited Roles from the Parent Subject will be auto populated in Chosen Roles list if they match the selected Security Grading.
Uncheck the Inherits Access List from Organization Chart to redefine the access rights to the File. Any changes to the Cabinet / Subject’s access will not be propagated to this case series.
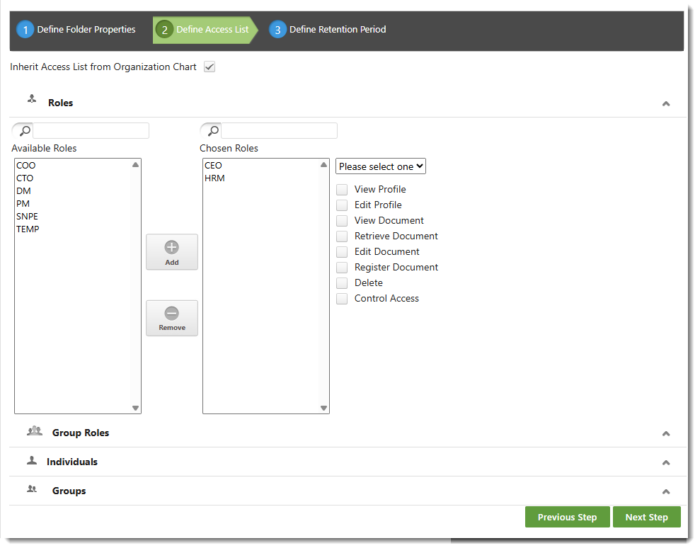
9. Click on Next Step button.
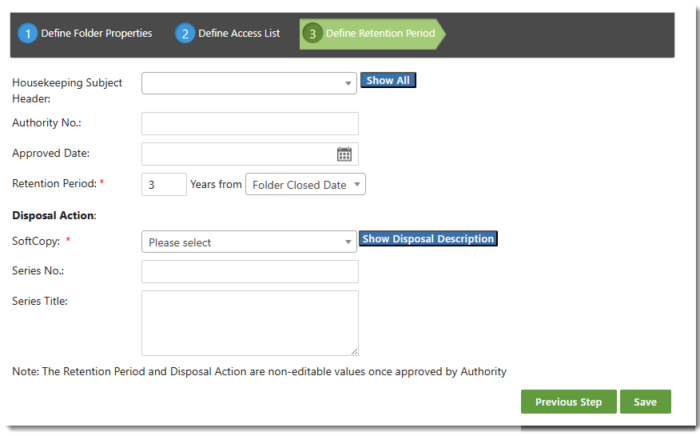
10. Enter the Retention Period and Disposal Action – Softcopy
-
- Retention Period – The duration to keep the records in the Case Series (in Years).
-
- Disposal Action – The action to be taken after the expiry of the Records based on Case Series’s Closed Date
- Disposal Action – The action to be taken after the expiry of the Records based on Case Series’s Closed Date
11. Click on Save button to save the changes
To create a Case,
- Click on Module Switcher at the top bar and select KRIS Administrator module.
- Click on Manage Folder link under Manage Classification section.
- Click on Classification Tab for e.g. Subject.
- Click on > to expand the classification.
- Select the Case Series that need to add a Case File.
- Right click on it and click on Add Case.
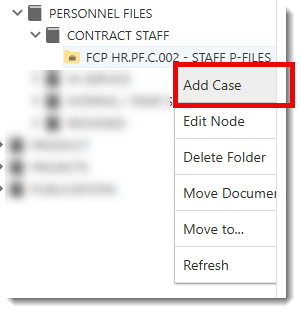
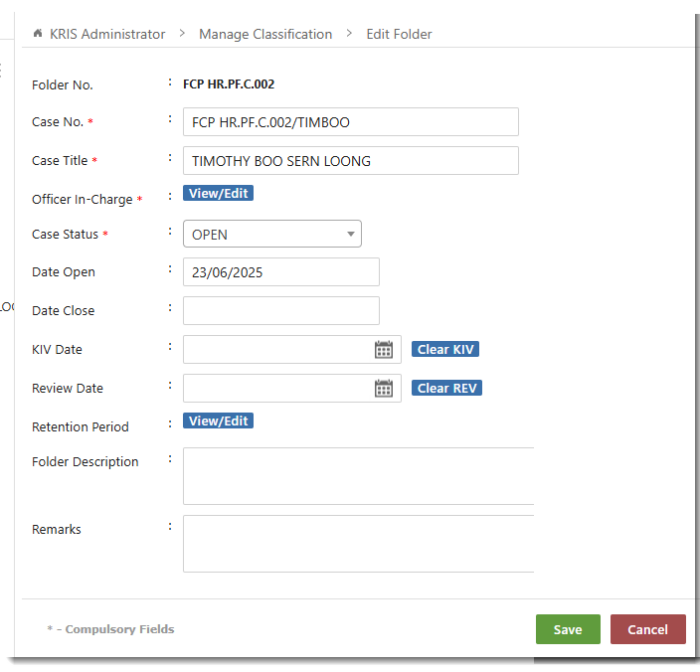
- Filling in the compulsory fields (*) :
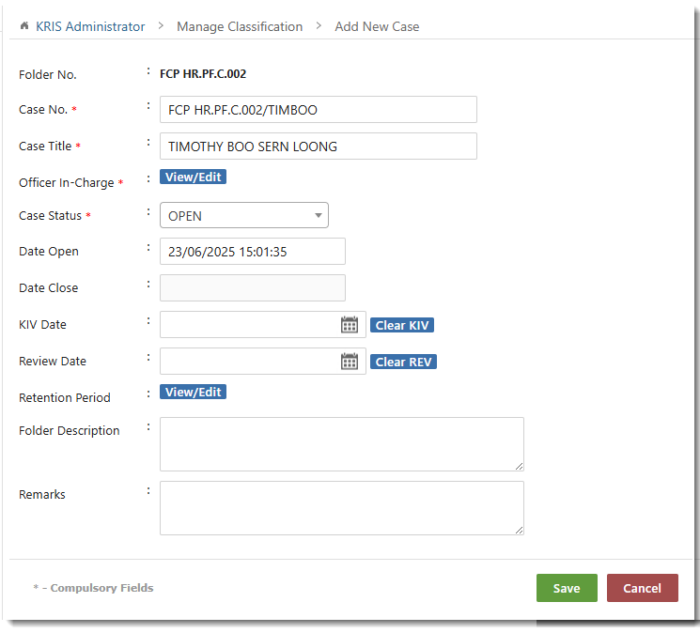
- *Case No. –
- The unique identifier of the Case File which is non-editable after saving. (Note the Case No. has to be unique in the organization)
- It is auto populated with Case Series No (editable) if the Default Case No to File No is turned ON in System Setting – Classification.
- *Case Title – The descriptive name of the case
- *Officer In-Charge – The Roles/Users who are in charge of this case. For information purpose only.
- *Case Status – The Status of the Case Folder (e.g. Active or Closed or Mark for Deletion). It is defaulted to Active when creating a new folder.
- Date Open– Date the Case Folder is opened/created in the System.
- Date Close – Date the Case Folder is Closed in the System.
- KIV Date – To be used in a Case Management scenario when administrator can set a KIV date on this Case Folder. For information purpose only.
- Review Date – To be used in a Case Management scenario when administrator can set a Review date on this Case Folder. For information purpose only.
- Retention Period – Auto Inherited from Case Series
- Folder Description – More information on this Case Folder
- Remarks – Additional comments on the Case Folder .
- *Case No. –
- Click on View/Edit button at Officer-In-Charge field.
A window will be displayed contain the list of the Users/Roles who are in charge of this case. This set of users are inherited from Case Series.
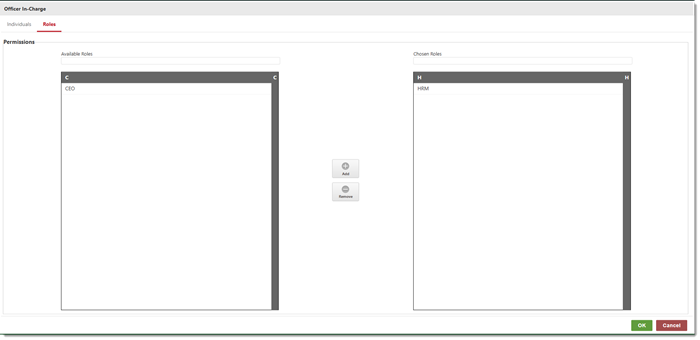
9. Select the user/role from the available individuals/roles.
10. Click on Add button.
11. Click on OK button to save the selection in Officer In-Charge window.
13. Click Save button to create the case file.
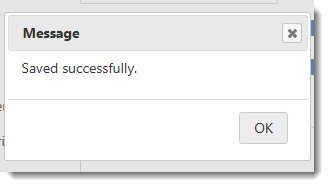
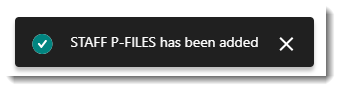
14. Click OK to dismiss the save message.